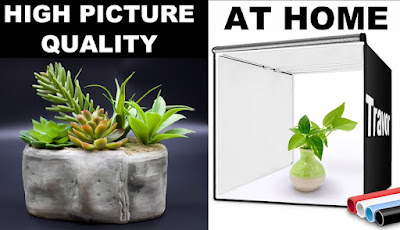
This is the new Travor photo studio Lightbox.
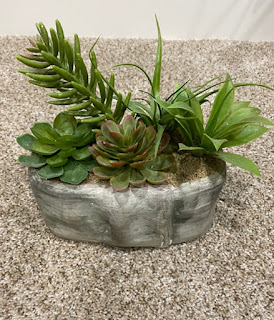
This affordable photo studio light is the tool that you need to produce high quality photos, you can go from this:
To this:
Perfect for your e-commerce store, Amazon, eBay, OfferUp, pretty much anything that requires high quality pictures. Now let me make this clear, I am not a professional photographer, I am a regular guy with a DSLR camera and an iPhone, if I can produce these high quality pictures, imagine all you can do with this affordable Travor photo studio light box.
If you are looking for a studio light box this might be the one for you, the box that I am reviewing today is the 32 inches, they also have 16, 24, 35, and 39 inches, you will find Amazon links in the YouTube video description so you can go check them out.
Your order will arrive in a cardboard box, inside you will find your new Travor light box nicely packed in a carry bag, it is a bit heavy 12.6 pounds, this is not a problem because the carry bag is high quality
Inside of the carry bag you will find:
- A bag with a soft cloth to clean the light box
- The light dimmer
- On & off switch combo with your power adapter
- Frame tubes
- Multiple plastic corner pieces
- The manual
- 4 plastic backgrounds red, black, blue and white
- 2 LED bars
- The cord for the power adapter
- And lastly the top cover
The quality of most of the pieces feel good, I mean they are not premium quality but they feel good, if you are careful this light box could last many years.
The assembly of the frame is very simple, grab the frame tubs and push them in to the plastic pieces, once you have a cube the next step is to put the top cover, make sure to install the LED light bars before covering the top section of the cube.
Now it's time to connect the power adapter to the LED bars, grab the dimmer and insert the cables through the small hole on top of the box, once the cables are inside you can easily connect them to the LED bars.
Make sure to connect the cable to an electrical outlet, turn on the switch, and now turn on the dimmer, choose your background color, and there you have it. Your own personal home studio.
The LED bars are very bright and don’t create any hard shades, the reflective walls of the box help a lot to make a nice uniform light, there is an additional hole on top of the box to shoot overhead photos, the LED bars are adjustable and you can also slide them to any position. I’ve had this box for a few days and I am very happy with it, you can produce high quality photos with minimum effort.
These are some examples of the quality that you’ll get with this studio light box.
As I mentioned before, I am not a professional photographer, I took these photos using my iPhone, this studio light is perfect for amateurs and even professionals.
Ok, here are 3 Pros and Cons based on my experience with this photo studio light box.
- The first pro is that it is light weight, you can put in the carry bag and take it anywhere with you.
- Second, your pictures will look amazing like if they were taken in an expensive photo studio.
- And third, you can detach the LED bars and use them as a key light, or for your green screen, or additional lighting pretty much anything you want.
Ok, now the Cons.
- It is difficult to install the top cover, it took me over 10 minutes to install it, mainly because it is too tight, I am not sure if the frame is too big or the top cover too small.
- Second, the background colors are difficult to install as well, you need to spend some time to perfectly align the background color to the lip on the bottom and on the top of the box, since they are made of hard plastic they roll back up. It would be nice if it had some kind of clips or velcro to install them easily.
- And the third con is when you have to take it apart, you have to do multiple steps and deal with multiple pieces, it would be nice if the walls were attached together and you could just fold them.
Other than that I am happy with this set up, you can even shoot at night or in low light conditions, the results will be impressive every single time.
Based on my experience with this Travor photo studio light box, I recommend it 100%, I am not a professional photographer but I was able to produce high quality photos with minimum effort, I hope this review was helpful I will leave the Amazon links in the description of the YouTube video so you can go and purchase this Travor photo studio light box.
YouTube video review:


 Admin
Admin


 Posted in:


